IAC Decision
Working with the "IAC Decision" list
Description of the process for uploading the terrorist list to the Brainysoft system (hereinafter - BS), performing further searches through this list, and identifying individuals from the IAC Decision list.
Access to functionality
To start working with the IAC Decision search functionality, go to the main page menu "Admin" → "IAC Decision".

1. Uploading the list
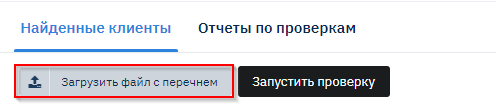
The file is downloaded from the MCC personal account on the Rosfinmonitoring website and imported into the BS system. You can upload a file with the terrorist list using the "Upload file with list" button on the "IAC Decision" screen, specifying the path to the file. File format is *.xml.
After uploading the list, the user has access to information about the upload history, including the date and time of upload, the name of the uploaded file, and the number of records in the uploaded document. It is possible to download the file by clicking on the document name in the upload history.
The list is uploaded to a shared database; after uploading, the list will be available to all Brainysoft clients.
When re-uploading the list, the user will receive a notification that such a list has been uploaded previously (regardless of which organization uploaded it).
2. Search by "IAC Decision" list
2.1. Automatic check
For each new customer request. Customer verification occurs automatically every time a new loan application is created. To do this, you need to add the corresponding step to the decision-making system - "IAC Decision".
2.2. Mass check
Across the entire customer database. To start the check, click the "Start check" button.

Customer verification will begin immediately after launch. Upon completion, a report will be generated. A record of the verification results will be added to the check history for each customer.
2.3. Selective check
For an individual customer. Each customer has a "Customer checks" widget. In the widget, you can start a check for the customer and view the history of previously performed checks.
3. Check results
3.1. "Found customers" screen
The found customers list includes all subjects detected in the list based on the results of checks in the DMS and batch verification across the entire database.
The list form contains:
- Customer – Full name of the found individual. It is possible to follow the link to the customer.
- Database record – Subject identifier from the "IAC Decision" database. It is possible to display information from the list.
- Current status – Last verification status of the customer.
- Status history – Customer verification history. Shows the results of DMS verification and batch verification.
3.2. Mass check report
Upon completion of the batch verification across the entire customer database, the user has access to a verification report.
The screen displays the history of batch verification launches. The report is presented in *.xlsx format.
The report is divided into two parts:
- Right part (blue): subject data from Brainysoft.
- Left part (green): subject data from the "IAC Decision" list.