Guide to Working with Contracts in the Brainysoft System
After a loan application passes all checks and is approved by a verifier, a contract is created. In the Brainysoft system, the "Contract" object is used for signing agreements and subsequent disbursement of funds, as well as for viewing financial information on the contract.
Contracts represent a list of the organization's credit contracts. They can be created and deleted as needed. It should be noted that issued contracts cannot be edited or deleted.
In the main menu, click the "Contract" button, and you will be taken to the following page:

Here you can search for a contract, configure filtering to display contracts, and request reports with various parameter sets.
Searching and Filtering Contracts
Filter Configuration
For frequently used parameters, you can configure a filter for quick access to data and select the users who will have access to it. In the example below, the filter "Contract created - no limit" is selected.

Searching for Contracts
To use the search, select a search parameter from the dropdown list and enter the data in the search field.

From the dropdown list, select the desired contract or surname.
Working with a Contract
Basic Information
You will arrive at the contract page, where the following information is provided:

Toolbar
The top panel contains the Print button – here you will find print forms and you can download the "Loan Agreement for this contract", or "Supplementary Agreement on Extension" (if the contract has been extended), and any other configured form.
The Audit button - generates a report showing changes that have been made to this entity.
Contract Tabs
All contract data is grouped into tabs for ease of entry and viewing:
- Request
- Credit Product
- Additional
- Collateral
"Request" Tab
Creation Date – the current system date is automatically set, but it can be changed to an earlier date. This is relevant for cases when a contract is created retroactively.
Contract Code – the contract code is set automatically as the maximum number +1, but it can be edited.
Credit Product – the name of the credit product.
Loan Amount – the loan amount specified in the application (in edit mode, the amount can be reduced).
Currency – the currency is indicated, default is "Ruble".
Branch – the branch is indicated, filled in automatically.
Division – the division is indicated, filled in automatically.
Funding Source – the source from which the client will repay the loan.
Loan Category – type of loan: secured, guaranteed, with surety, etc.
Planned Disbursement Date – the current system date is automatically set, but it can be changed to an earlier date. This is relevant for cases when a contract is created retroactively.
First Repayment Date - the current system date is automatically set, but it can be changed.
Planned Repayment Date – calculated according to the schedule for the selected application from the first repayment date.
For Disbursement – check the box if funds can be disbursed under the contract; if "No", fund disbursement will not be available, the default status is "No".
"Credit Product" Tab
Here you can view information about the loan terms. The credit product can be edited to meet the client's individual needs, thereby creating special lending conditions. Changes to the credit product will only apply to this contract. The ability to edit can be disabled if necessary.

"Additional" Tab
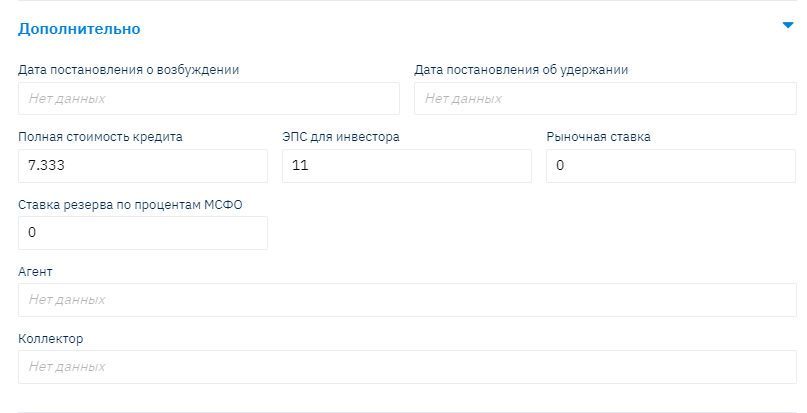
Date of initiation order, date of withholding order - the dates of the orders are indicated.
IFRS Reserve Rate -
Total Cost of Credit - calculated automatically when the contract is concluded.
Agent - select an agent from the dropdown list; this field is linked to the "Agent Contracts" directory.
Collector - select a collector from the dropdown list; this field is linked to the "Collector" directory.
Court Filing Date - the date of filing with the court is indicated.
Court Case – a value is selected indicating whether this contract is in litigation or not.
Claim Amount – the claim amount is indicated.
"Collateral" Tab
Contains information about co-borrowers and the collateral item. To change data in the contract, click the "Edit" button on the top panel. After entering all required fields, click the "Save" button.
Contract Widgets
On the right side of the application page, there is a set of widgets that simplifies the work of organization employees.

1. Action History Widget
Reflects the stages of application verification, where a green checkmark indicates successful completion of a stage, and a red cross indicates failure at a specific stage.
2. Scoring Widget
Contains information about the scoring scheme name and a "Verification Graph" button. Clicking on it opens a window with a flowchart visually depicting the stages of application verification. If the scheme has multiple branches, the path taken during verification will be indicated by color.

3. Client Notes Widget
Here you can see all previously created messages about the client, and by switching from the "Read" tab to the "Write" tab, you can write information about the client.