Instructions for Working with Personal Account
Example URL: https://demo-lk.brainysoft.ru

Purpose and Main Functionality of the Borrower's Personal Account
The Borrower's Personal Account is designed to facilitate interaction between the MCC and potential or existing Borrowers.
The main goal is to speed up and simplify interaction between the Client and the MCC during client registration, application submission, fund disbursement, payment acceptance, and document signing.
The Personal Account allows automating the following processes:
- Registration of a new user (borrower).
- Identity verification.
- Uploading required documents (scans, photos).
- Submitting a loan application.
- Linking a card for subsequent disbursement.
- Signing consents, contracts, and additional agreements during extension.
- Viewing current information on Applications (status) and Contracts (Schedule, payments, debt information).
- Ability to pay current debt, repay the loan early, or make a payment sufficient for extension.
Some processes are implemented through integration with additional services:
- User authorization, document signing — with integration with mobile operators (SMS, email, voice calls).
- Photo uploads, document storage — Brainysoft FS Service (file storage).
- Automatic document generation — Brainysoft PF Service (print forms).
- User identification — with integration with UPRID services, as well as Government Services.
- Card linking, payment acceptance, payment capability — with integration with Payment systems.
Note: To connect external system services, a valid contract with the MCC is required.
Authorization in Personal Account
URL: https://demo-lk.brainysoft.ru/auth

User authorization in the Personal Account (hereinafter — PA) is possible by phone number. When an unregistered user attempts to log in, the following message is displayed:

To complete registration, click the "Register" button.
New Client Registration
Step 1. Full Name: Filling in Personal Data and Phone Number
URL: https://demo-lk.brainysoft.ru/registration

An informational message is displayed at the top of the screen:
"To obtain a loan, you will need a passport, SNILS, and a bank card in your name."
Below are input fields:
- Last Name, First Name, Patronymic — DaData service directory.
- Date of Birth — the calendar opens on the current date, dates no later than minus 18 years from the current date are available.
- Gender — Brainysoft system database directory.
- E-mail — minimum 6 characters, Cyrillic input is not allowed. Email must contain the
@symbol and a dot, there must be at least one letter or digit between@and the dot. If the entered email for a new client is found in the Brainysoft system database, the following message is displayed:"This email is already in use. Enter a new one."
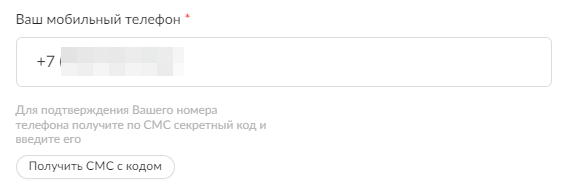
- Client's Mobile Phone — the phone number starts with
+7, minimum and maximum number of characters is 11. After fully entering the phone number, the text "To confirm your phone number, receive a secret code via SMS and enter it" and the "Get SMS with code" button appear below the field:
- Additional Phone — the field is hidden until the client fills in the "Your mobile phone" field. The phone number starts with
+7, minimum and maximum number of characters is 11.
All input fields (except Additional Phone) are required.
At the bottom of the screen, a checkbox with clickable text is displayed:
"I agree to the processing and use of my personal data by MCC DEMO LLC."
The checkbox is not pre-selected. When clicking on the clickable text, a modal window "Terms of Information Transfer" appears.
The "Next" button becomes active only after all of the following conditions are met:
- All required input fields are filled with valid values.
- The mobile phone number is confirmed via SMS code (a green checkmark is displayed in the secret code input field).
- The checkbox for consent to processing and use of personal data is checked.

After clicking the active "Next" button, the page with the next registration step opens.
Step 2.1. Additional: Filling in Passport and SNILS Data

An informational message is displayed at the top of the screen:
"Data must be filled in exactly as indicated in the passport!"
Below are input fields:
- Passport Series (4 digits).
- Passport Number (6 digits).
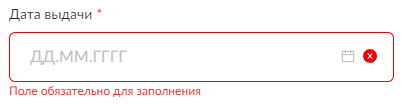
- Issue Date (cannot select a date in the future or before the client's 14th birthday).
- Place of Birth (Latin characters are not allowed).
- Division Code (filled in exactly as in the passport) (6 digits).
- SNILS Number (11 digits).
All input fields are required to continue registration. If at least one field is left empty and the "Next" button is clicked, this input field will be highlighted in red and a notification will be displayed: "Field is required."
On this page and each subsequent one, two active buttons are displayed at the bottom of the screen: "Back" and "Next". The client can return to any step and edit previously entered data.
Step 2.2. Additional: Filling in Address
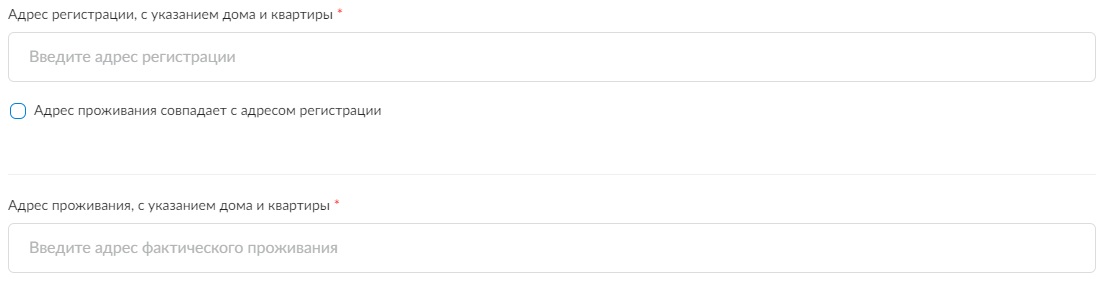
The page displays the following elements:
- Input field "Registration address, including house and apartment number" — DaData service directory (FIAS).
- Checkbox "Residential address matches registration address" (active by default, checkbox is pre-selected).

To continue registration with the checkbox active, filling in one input field "Registration address" is required.
When the checkbox is unchecked, an input field appears below:
- "Actual address, including house and apartment number" — DaData service directory (FIAS).
To continue registration with the checkbox inactive, filling in two input fields is required: "Registration address" and "Actual address".
When starting to enter an address, FIAS system address "suggestions" are displayed.

When selecting a "suggestion," the address is broken down into the corresponding fields.

Step 2.3. Additional: Filling in Employment Information

The page displays input fields:
- Education — Brainysoft system database directory.
- Employment Type — Brainysoft system database directory.
- Field of Employment — Brainysoft system database directory.
- Workplace Name.
- Marital Status — Brainysoft system database directory.
- Number of Dependent Children.
All input fields except "Workplace Name" and "Number of Dependent Children" are required to continue registration.
If the value "Unemployed" is selected in the "Employment Type" field, the "Field of Employment" and "Workplace Name" fields are hidden (the "Unemployed" value must be added to the Brainysoft system database directory).
Step 2.4. Additional: Filling in Income Information

The page displays input fields:
- Take-home Income;
- Next Payday — only future dates are available for selection;
- Monthly Housing Expenses;
- Number of Active Credits and Loans;
- Additional Contact Person and Additional Contact Phone — the number of additional contact persons can be changed by clicking the "Add" button and the "-" icon.

Only the "Take-home Income" and "Next Payday" fields are required. If "Unemployed" was selected in the "Employment Type" field in the previous registration step, these fields also become optional for continuing registration (the "Unemployed" value must be added to the Brainysoft system database directory).
Step 3.1. Identification: Uploading Passport Photos

An informational message is displayed at the top of the page:
"To verify that you are who you say you are, we need photos of two pages of your passport. Photos must be in color, without cropping, glare, or distortion, with clearly readable entries."
In the center of the screen, there are two slots for uploading photos of passport page spreads:
- Photo of the spread with last name, first name, and patronymic;
- Photo of pages 4–5 spread.
Below the slots, an informational message is displayed:
"If the photo doesn't upload, check that it is 5 MB or less and in .jpg or .png format."
Uploading two passport spreads of the correct size and format is required to continue registration.
Step 3.1. Identification: Uploading Selfie with Passport

An informational message is displayed at the top of the page:
"You will need to upload your photo with your passport open to the main spread (with your photo and your last name, first name, and patronymic)."
In the center of the screen, there is one slot for uploading a selfie photo with passport.
Below the slot, an informational message is displayed:
"If the photo doesn't upload, check that it is 5 MB or less and in .jpg or .png format."
Uploading a selfie photo with passport of the correct size and format is required to continue registration.
Step 3.2. Identification: Signing Documents and Confirming Mobile Phone

An informational message is displayed at the top of the screen:
"To complete registration, you need to review and sign the following documents:"
and two checkboxes with clickable text:
- Consent to Personal Data Processing;
- Loan Provision and Service Rules.
Both checkboxes are inactive by default (not checked). When clicking on the checkbox text, the corresponding documents are loaded.
After the checkbox block, a disclaimer is displayed:
"To confirm your phone number, receive a secret code via SMS and enter it",
and the "Get SMS with code" button.
When clicking the "Get SMS with code" button, a code input field and "Confirm" button appear.

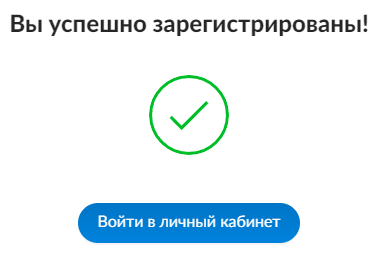
To complete registration, both checkboxes must be checked and the secret code from SMS must be confirmed. When entering the correct document signing confirmation code, a green checkmark is displayed in the input field, and the "Next" button becomes active.

After clicking the "Next" button, the client's PA is created and a client card is created in the Brainysoft system. A successful registration message and the "Go to Personal Account" button are displayed.
The registered client appears in the Client List in Brainysoft.

Photos of two passport page spreads and a selfie with passport, as well as the Consent to Data Processing, are saved in the Brainysoft system in the client card (Passport, Borrower Photo, and Personal Data Processing tags respectively).

PA Main Page
In the PA, all documents signed by the client are saved in the "Documents" section with the ability to download for review.

Opting Out of Marketing Mailings
The client has the ability to opt out of receiving marketing mailings (news and special offers). To do this, click on the user icon in the upper right corner of the PA screen and click the "Profile" button in the dropdown menu.

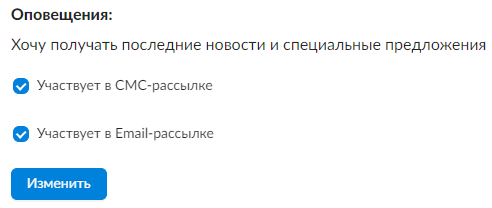
At the bottom of the opened "User Profile" page in the "Notifications" block, there are 2 checkboxes checked by default:
- Subscribed to SMS mailings;
- Subscribed to Email mailings.
To opt out of mailings, uncheck the corresponding checkbox and click the "Change" button.
If one of the mailings is declined, when submitting a loan application at the "Document Signing" step, a checkbox with clickable link text "I accept the terms of information transfer" is displayed (clicking opens the "Consent to Receive Advertising" document in a new browser tab), the checkbox is pre-selected by default. For clients who are subscribed to all types of communication, the "I accept the terms of information transfer" checkbox is not displayed.

The mailing subscription status is transmitted to the Brainysoft system and displayed in the "Mailings" widget in the "About Client" card.

"Get a Loan" Widget
To submit an application in the PA, there is a "Get a Loan" widget with two sliders for selecting the loan amount/term (100 rubles / 1 day step respectively) and the "Get Money" button.

Amount and term limits are set in the credit product parameters in the Brainysoft system database (Directories - Credit Products).

The credit organization's phone number (in the header next to the logo) is displayed from the Brainysoft system — Legal Entities directory, "Phone" field.

Submitting a Loan Application
Step 1. Personal Data Confirmation
When submitting a first/repeat application after clicking the "Get Money" button, the client proceeds to the stage of confirming/editing personal data entered during registration. At this point, a lead is created in Brainysoft, which initially contains primary data from the client card. After signing the consent or proceeding to the next step, the data in the lead and in the client card in the Brainysoft system is updated.
The page contains blocks with data from the client card in Brainysoft:
- Full name and contact information;
- Passport data and SNILS;
- Address;
- Additional information.

When editing one of the fields, the client needs to re-upload current photos of two passport page spreads and a selfie with passport, as well as sign a repeat Consent to Provide Personal Data and Loan Provision and Service Rules.
- Page for uploading photos of two passport pages.

- Page for uploading selfie photo with passport.

- Page for signing repeat Consent to Personal Data Processing and Loan Provision and Service Rules.

Newly uploaded photos of passport pages and selfie with passport, as well as the signed Consent to Personal Data Processing, are saved in the PA in the Documents section, as well as in the Brainysoft system in the client card - Uploaded Files block (passport photo with LoanApp tag):

Step 2.1. Selecting Loan Purpose
After uploading the passport photo and Consent, the client is directed to the "Specify Loan Purpose" page with the ability to select a loan purpose from the dropdown list. The list of purposes is contained in the Brainysoft directory. The selected value is saved in the Brainysoft system in the Loan Application.

Step 2.2. Confirming Loan Amount and Term. Identification Request
Next, the client can confirm/change the loan amount and term.

After confirming the loan amount and term, when clicking the "Next" button, a request for client data confirmation is sent to the SMEV database. With each request, a check is performed: whether a request with the specified data was previously sent and what response was received. If there was no such request (the client changed their personal data), the request is sent again.


Step 2.3. Linking Client's Bank Card
On the next page, the client can add a bank card to which the loan funds will be transferred. Integration with the SBC (Arius) payment system is configured.
In the center of the screen, the "Add Card" slot is displayed.

When clicking on the "Add Card" slot, the client is redirected to the "Obtaining Bank Card Token" page.

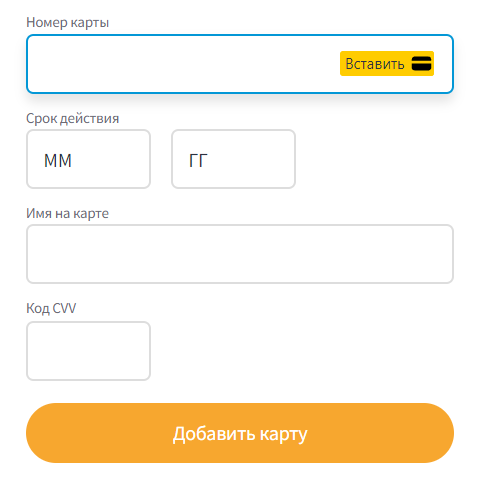
After filling in the bank card details and clicking the "Add Card" button, the system waits for a response from the payment system.

Upon successful linking, the bank card is displayed in the slot on the "Selected Card" page. Only one bank card can be linked. When clicking on the "Select Another Card" field and adding a new bank card, the previously linked bank card data is deleted.

After successfully linking the card, when clicking the "Next" button, the loan application is created in the Brainysoft system and sent to the Decision Making System (DMS). The card token for disbursement is recorded in the lead.

Loan Application Review Process
Applications after creation are automatically sent to the Decision Making System (hereinafter - DMS), channel - SITE (Admin - Channels).
During the application review, the "Verification" status is displayed in the PA. On the left side of the screen, a widget with the message "Your application is being reviewed!" and the "Details" button is displayed.

When clicking the "Details" button, a screen with loan terms information (amount and term) opens.

At the next step - "Offer Signing" - the application status in the PA changes to "Pending", on the left side of the PA a widget with the message "Please sign the contract!" and the "Details" button is displayed.

After clicking the "Details" button, a page with an application approval message, approved application parameters, and the "Sign Contract" button opens.

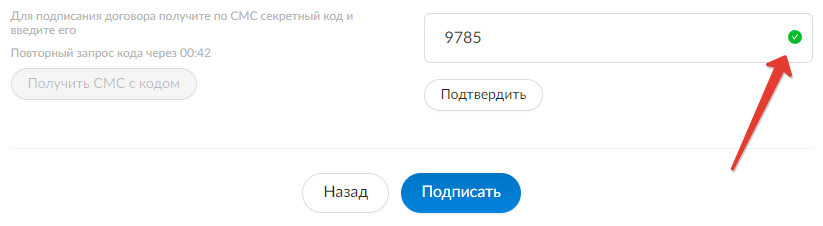
When clicking the "Sign Contract" button, the "Sign the Contract" screen opens, which displays the following elements:
- link to download the Offer Agreement;
- "Get SMS with code" button;
- "Back" button (active);
- "Sign" button (becomes active after entering the secret code from SMS).

After clicking the "Get SMS with code" button, a secret code input window and "Confirm" button appear.

When entering the correct contract signing confirmation code, a green checkmark is displayed in the input field, and the "Sign" button becomes active.
After clicking the "Sign" button, a window with the message "Await the receipt of funds to your card", detailed loan parameters, and the "To Main" button for navigating to the PA main page opens.

The application status in the PA changes to "Active", on the left side of the PA the "Get a Loan" widget is displayed, the client can submit a new loan application.
The Brainysoft system has a limit on the number of active loans — maximum one. The client cannot apply for a new loan until the current one is repaid.

Loan Application Rejection
In case of loan application rejection, its status in the PA changes to "Rejected", on the left side of the screen a widget with the message "Application Rejected" is displayed.

Full/Partial Loan Repayment. Loan Extension
On the second day of the loan, 3 widgets appear on the right side of the contract page in the PA:
- Early Loan Repayment;
- Partial Loan Repayment;
- Extend Contract Term.

Early Loan Repayment
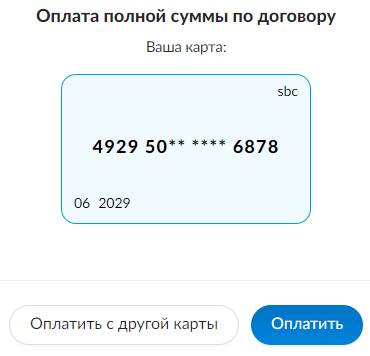
When clicking the "Pay" button in the "Early Loan Repayment" widget, a page for paying the full contract amount with linked bank card details and two buttons "Pay with Another Card" and "Pay" opens.
After successful loan payment, a page with the message "Payment Request Sent" and the "Return to Loan" button opens.
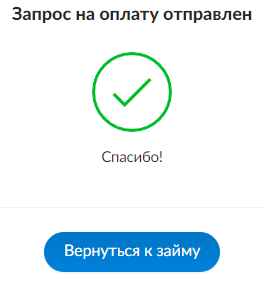
The loan (Contract) status in the PA changes to "Repaid", on the left side of the PA the "Get a Loan" widget is displayed, the client can submit a new loan application.

Partial Loan Repayment
When clicking the "Pay" button in the "Partial Loan Repayment" widget, a page with an input field for an arbitrary payment amount opens.
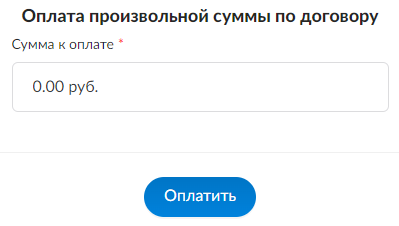
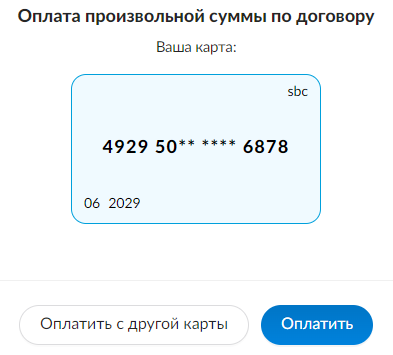
After entering the payment amount and clicking the "Pay" button, a page for paying an arbitrary amount under the contract with linked bank card details and two buttons "Pay with Another Card" and "Pay" opens.
After successful payment of an arbitrary amount, the payment information on the loan contract page is updated, and the partial repayment amount is displayed in the Payments dropdown list at the bottom of the screen.

Contract Extension (Prolongation)
Loan prolongation is available from the third day of the loan contract. When clicking the "Postpone" button in the "Extend Contract Term" widget, a page with four options for changing the loan payment term opens.

The "Next" button becomes active after selecting one of the prolongation options. Only one option can be selected.

On the next page, the client is offered to review the Prolongation Agreement (available for download) and sign it by receiving a secret code via SMS.

After signing the additional prolongation agreement, payment for the contract term extension is required.
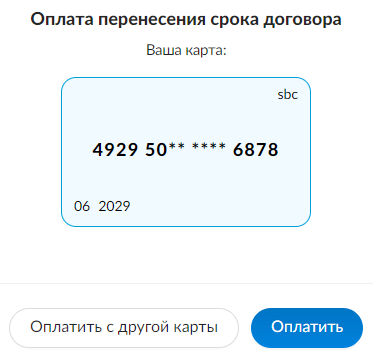
After successful payment for the term extension, the payment information on the loan contract page is updated, and the new date of the next loan payment is recorded in the contract parameters. The contract term extension payment amount is displayed in the Payments dropdown list at the bottom of the screen.
