Customer Management Guide
This guide provides a detailed description of working with the "Customers" button.
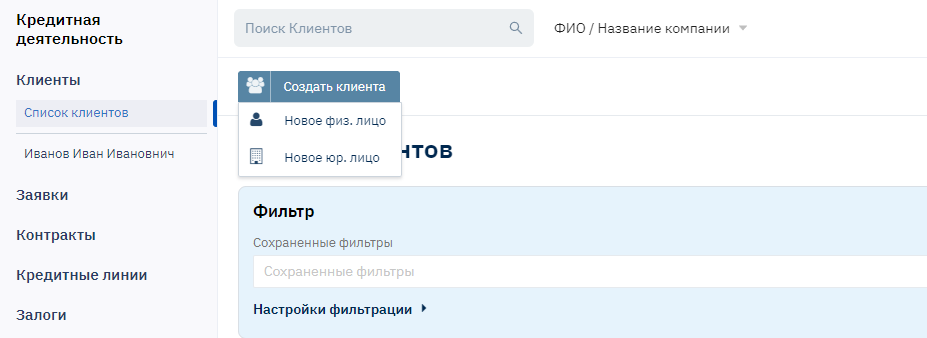
When you click the "Customer" button, a window opens with the ability to search, view, and edit an existing customer, as well as create a new one. This is also where you fill in profile data for borrowers, pledgors, guarantors, agents, etc.
Searching and Creating Customers
Searching for Existing Customers
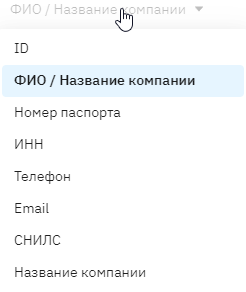
To search for existing customers, enter the first letters of the last name in the search bar, or search by matching letter sequences. You can search by customer ID, passport number, TIN, phone number, company name (for legal entities), or customer group name.
Select the desired search criteria.
Enter the desired letter combination.
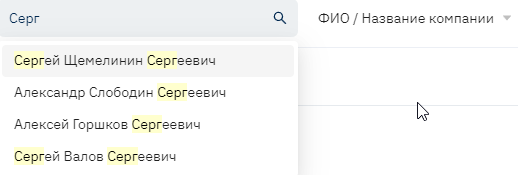
Select the customer you need from the dropdown list.
Creating a New Customer
To create a new customer, click the "New Individual" button (customers can be either individuals or legal entities. Depending on the type of entity selected, windows with different fields open for input).
The following form is displayed on the page:

Filling in Profile Data
Required Fields
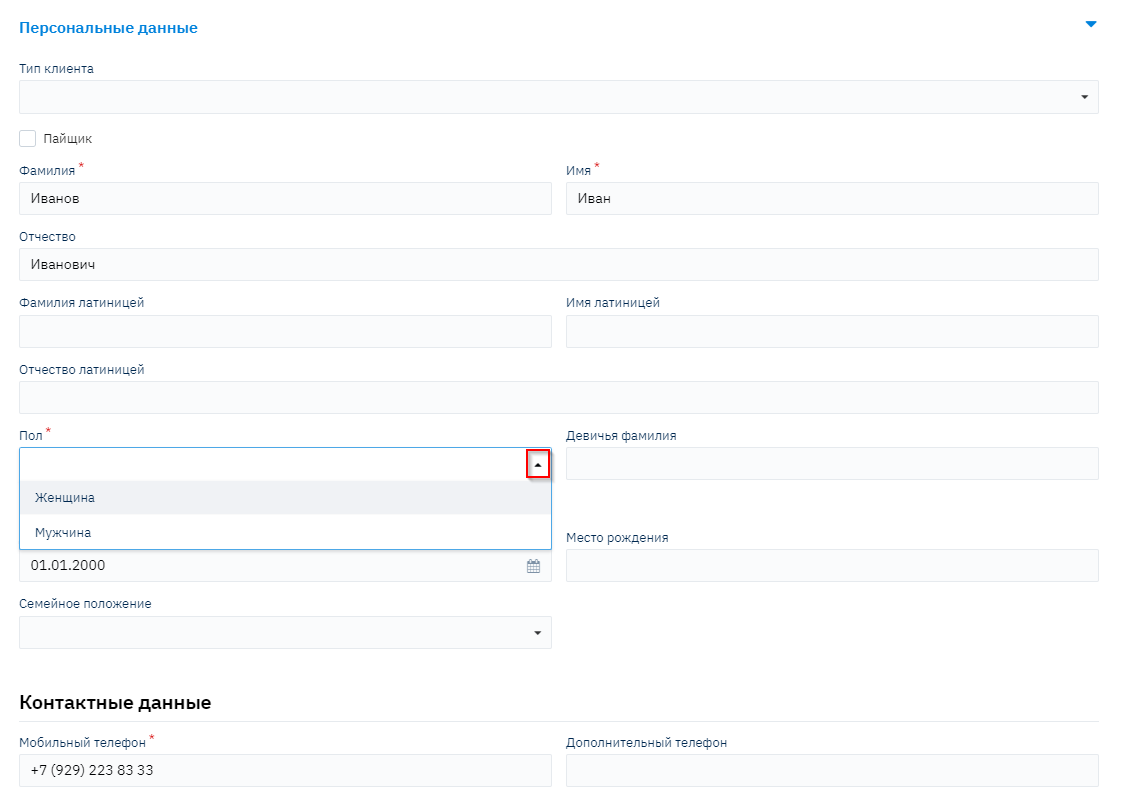
Please note that fields marked with an asterisk «*» are required. This is usually because this data needs to be submitted to credit bureaus, and this data is mandatory for requests. If these fields are not filled in, we will not be able to save the customer in the database, and the program will display a corresponding warning.
Input Field Types
Fields are divided by input type. For example: date-related fields can be entered manually or using the "calendar". Fields related to directories cannot be entered manually; you must use lines from directories by clicking on the "triangle" and selecting the desired value.
Customer Profile Tabs
All customer data is grouped into tabs for convenience of input and viewing:
Personal Data
This tab contains the customer's main personal data: full name, gender, date and place of birth, marital status, contact information, customer type, TIN, SNILS, education, and other information. The set of displayed fields is configured according to the organization's needs.
Documents
This section contains the customer's passport data and information about additional documents.
Addresses and Bank Details
This section contains registration and actual residence addresses, additional address, as well as the customer's bank details.
Employment Information
This section contains all necessary information about the customer's employment and workplace, as well as phone numbers and names of employees.
Additional Information
This section contains additional information about the customer: dependents, average monthly income/expenses, additional income, property ownership, existing loans, active guarantees, criminal record information, and lawsuits.
Additional Contacts
This section contains information about the customer's relatives: full name, date of birth, relationship, address, phone numbers, workplace, and other information.
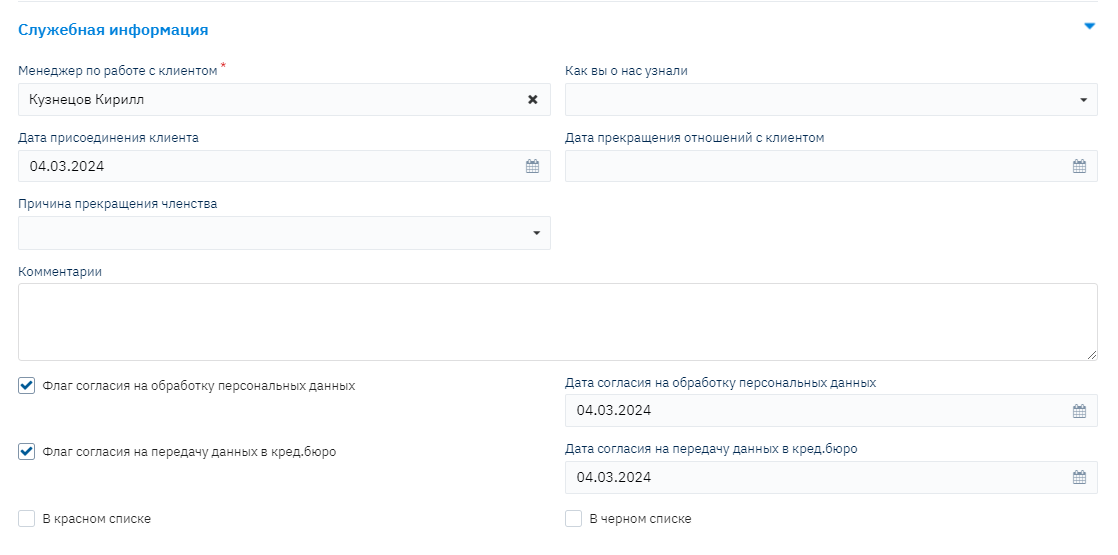
Service Information
This section contains service information about agents, customer managers, source of information about the company, date of joining and termination of relationship with the customer, and comments. This is also where the consent flags for data transfer to the credit bureau and personal data processing are located. Without checking the consent flag for data transfer and processing to the Credit History Bureau, information about this customer will not be uploaded to the Credit Bureau. If consent is given, you need to fill in the lines Date of consent for data transfer to credit bureau and Date of consent for personal data processing.
In the "Customer Manager" field, select a manager from the dropdown list (this field is linked to the "Loan Specialists" directory).
In the red list - check if the customer has had several serious violations in their credit history. This can be done later if such a situation arises. These fields are usually not filled in when entering a new customer.
In the black list - check if the customer is unreliable and should not be given a loan, meaning the customer's credit reputation is severely damaged.
AML/CFT
This section contains information about whether the customer is a beneficiary, the origin of funds, business reputation, whether the customer is a foreign politically exposed person, and involvement in terrorism and money laundering.
Risk Statuses
This section contains information about the customer creation date and applications for this customer, the responsible employee, as well as the customer reliability status and comments.
The system has a "Model Editor" function that allows you to configure all fields and tabs (keep only the necessary fields, or expand the amount of information provided about the borrower, drag fields between tabs, delete, rename). See the instructions «**Model Editor».
Go through all the tabs, filling in all the fields you need. Click the "Save" button.
Additional Functions
File Upload
To attach a photo or document scan to the customer profile, save the customer, then click the "Upload File" button.

Specify the path to the document and click "Open". Uploaded documents will appear in a list next to the photo icon.
Customer Actions
After saving the customer in the database (or if we are just viewing the customer profile), new buttons will appear under the search bar: "Create", "Check", and you can also access all objects created for this customer through the Customer section.
 The "Send Email" button - this functionality is designed to send email messages to both company employees and customers.

You can send an email message to all employees with a specific role by selecting only the role, or to a specific employee from the role. For this functionality to work, you need to specify employee email addresses when filling out the "Users" directory.
The "Print" button - here you can download the personal data processing agreement if there will be a credit history request to the credit bureau for this customer in the future.
The "Audit" button - generates a report that shows all changes made to this entity.

Customer Widgets
On the right side of the customer page, there is a set of widgets that simplifies the work of organization employees. This set of widgets consists of mandatory display widgets and configurable ones.
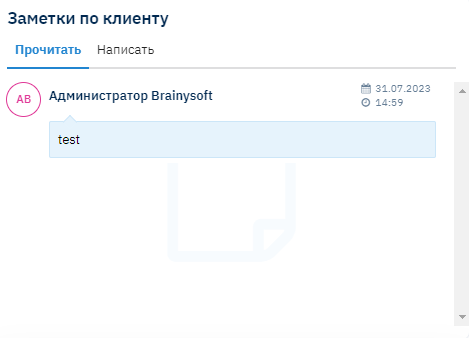
1. Customer Comment Widget
2. Mobile Phone Verification Widget
This widget is designed to verify the mobile number provided by the customer.
To verify the number, click the "Send Verification Code" button.
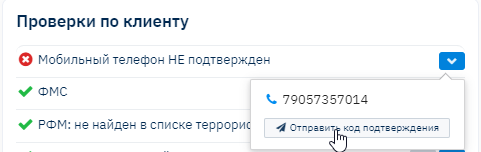
Next, the employee needs to enter the verification code dictated by the customer and click the "Verify" button.
If the provided code matches the sent code, the verification will be successful; if not, an error message will appear.
This functionality works with SMS provider integration.
3. Rosfinmonitoring Check Widget

This widget provides information about customer checks against the RFM database.
Check rules:
- When creating a customer;
- When creating an application (if RFM check is in the DSS);
- In manual mode (click the recheck button in the upper right corner);
- Automatically once a week.
4. FMS Check Widget
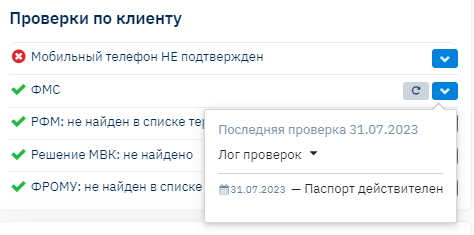
The widget shows the result of checking the customer's passport data.
Check rules:
When creating a customer;
When creating an application (if there is an FMS check in the DSS);
In manual mode (click the recheck button in the upper right corner).
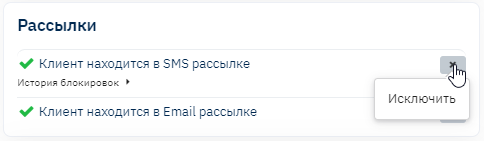
5. SMS and Email Mailing Widgets
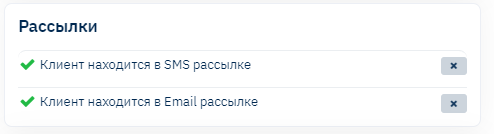
Brainysoft allows you to perform SMS and Email mailings. The widgets show whether the customer is on the SMS and Email mailing lists. If the customer has opted out of receiving information via one of the 2 mailing options, the employee simply needs to click the X and exclude this customer from the mailing lists.
6. Linked Cards Widget
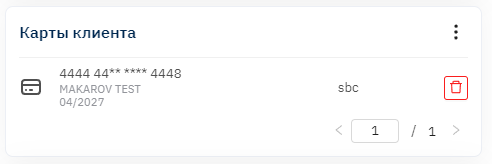
The widget shows the customer's linked cards, and in this widget, the employee can link a customer's card.