Creating a New User and Assigning a Role
Users are individuals who use the system to perform specific tasks or functions. This guide describes the process of creating a new user, configuring their settings, and assigning roles.
Viewing the User List
The list of existing users and the creation of new ones can be done in the "Users" directory.

Clicking on a user's name opens the editing page. On this page you can:
- Change the login, password, or department assignment.
- Restrict access to system functions.
- Block the user.
Creating a New User
To create a new user, click the "Create User" button. A form will open for filling out:

Fields to Fill In:
Login Specify a unique user login.
User Name Specify the employee's full name.
Email Enter the employee's email address.
Interface Language Select the interface language (e.g., "ru").
Access Level Select the access level from the dropdown list. Available options:
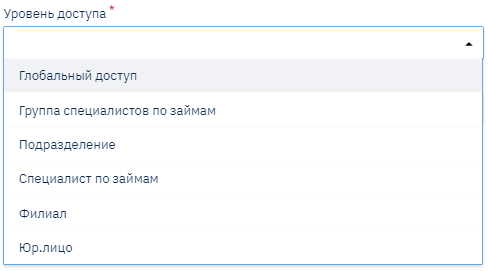
- Loan Specialist – access only to information about their own department and clients they have registered in the system.
- Loan Specialists Group – information is available to a combined group of users.
- Department – access to information within the department.
- Branch – access to information within the branch (includes multiple departments).
- Legal Entity – access to information within the legal entity (includes multiple branches and departments).
- Global Access – full access to all information (typically used for administrators or managers).
Department Select the department to which the user will be assigned.
Application Approval Amount Limit Specify the maximum amount up to which the user can view loan applications for approval or rejection.
List Form Visibility Restriction A flag that determines the display of data to which the user does not have access.
Access Blocked A flag for blocking the user.
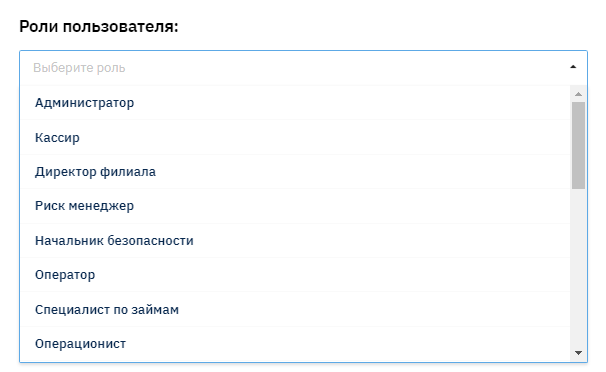
Assigning Roles
A role is a set of rights and access permissions associated with an employee's position or responsibilities. For example:
- Branch Director.
- Head Office Lawyer.
- Credit Manager.
Each role determines which system objects are available to the user (report generation, directory editing, cash flow operations, etc.).
Important:
- Multiple roles can be assigned to a single user.
- If a user has multiple roles, the restrictions will correspond to the most restricted role.
Saving and Sharing the Link
After filling in all fields, click the "Save" button. After that, a popup window will appear with a link to set the password:
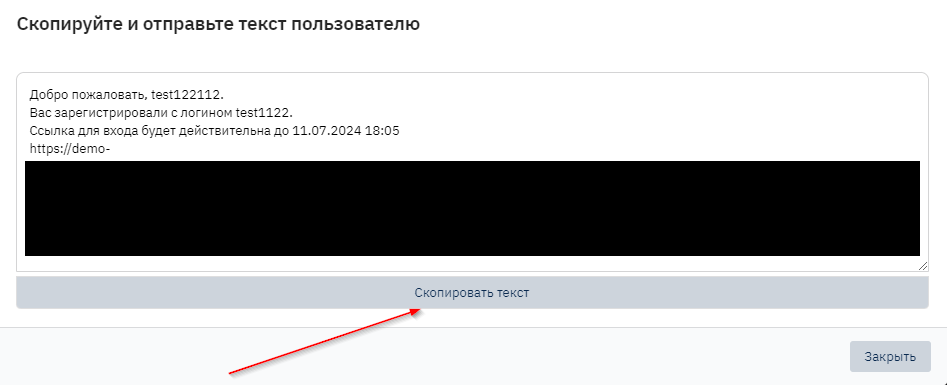
Share this link with the user to complete the registration.
Creating Roles
The process of creating roles is described in a separate guide: Creating Roles.
Note: Regularly check the relevance of user access levels and roles to prevent unauthorized data access.